Here’s a quick “how to” video showing you the basic concepts (below the video are step by step instructions).
Creating and updating a WordPress menu is an important step in making a website which is easy to navigate. Typically, when you create pages in WordPress they’re not added to the menu automatically, so we need to create the menu which shows how to get to the pages you’ve made. This blog shows you how to create such a navigation menu. Let’s start at the beginning:
Step 1: Login to your website’s dashboard.
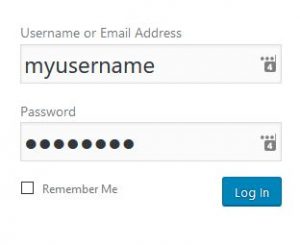
Just a quick aside on what may seem like a mundane issue to you. It is important that your username is something OTHER than admin. If it is admin, that means that all a hacker has to do is figure out your password in order to get into your website. You might want to check out some of the important things that Penner Web Design does to make sure that your website is kept secure. We have a web security package which you might be interested. You can explore it here:
https://pennerwebdesign.com/wordpress-web-security/
Step 2: Make sure your menu isn’t collapsed
If your menu only shows icons in a vertical row, click on the right arrow at the bottom of it (![]() see it at left) and your menu will appear with words on it. That’s a bit easier to follow.
see it at left) and your menu will appear with words on it. That’s a bit easier to follow.
Step 3: Create your pages
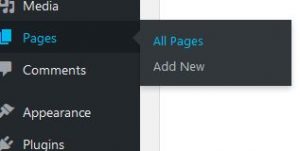
Generally the menu you create will point to pages you have created. If you have already created pages, you can see them by passing the cursor over the ‘Pages’ item in the menu list at the left and selecting ‘All Pages’.
If you haven’t created any pages in your WordPress website, find out how you can do that here: https://pennerwebdesign.com/blog/how-to-update-a-page-in-wordpress/
Step 4: Go to the section of WordPress where you control the menus

Now that you know how to create page, create 4 of them. Call them Home, About Us, Contact and Sample Page.
Next, pass your cursor over the word ‘Appearance’ (see left). A ‘flyout’ menu appears. Click on the word ‘Menus’ to go to the menu control area of WordPress.
Step 5: Name your Menu

Type the name that you want to give to your menu in the blank space beside the words “Menu Name“. Then click on the blue ‘Create Menu’ button.
Step 6: Select your Menu Settings

Usually you want the menu you are creating to be the ‘Top Menu’. Click on the little box to the left of the words ‘Top Menu’ and then click on the blue ‘Save Menu’ button.
Note: Some themes will refer to this type of menu as a ‘primary menu’ or ‘header menu’ or some similar term instead of ‘Top Menu’. Some themes will have different places where your menu appears and this is where you determine that.
Step 7: Select the pages you want on your menu
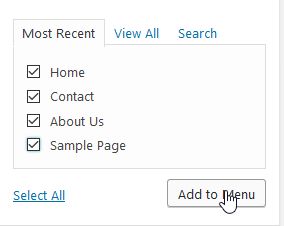
You will see the Most Recent pages that you have added to WordPress by default. If you have a lot of pages added over a period of time, you may have to click on the ‘View All’ tab.
We only have 4 pages in our little website. We want to add all of them to our menu. So click beside each page name to put a check mark there, and then click the ‘Add to Menu’ button as shown on the left.
(A short cut would have been to click ‘Select All’ and then the ‘Add to Menu’ button.)
Step 8: Save your menu

Click on the blue ‘Save Menu’ button on the right side of the page. This is a very important step because if you navigate away from the page without saving, everything is lost!
Step 9: Dragging Menu Items Around: Submenus and Reordering

Sometimes you want a menu item to ‘drop down’ from the main menu items you created above. To create a submenu item click and drag that menu item slightly to the right. In the illustration at the left, I have made ‘Contact’ a submenu underneath ‘Home Page’. Do that.
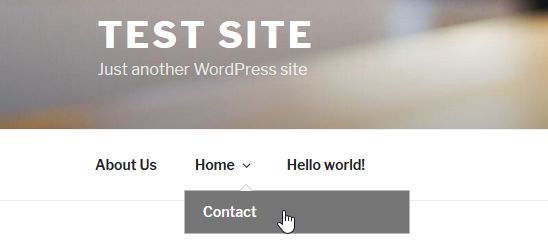
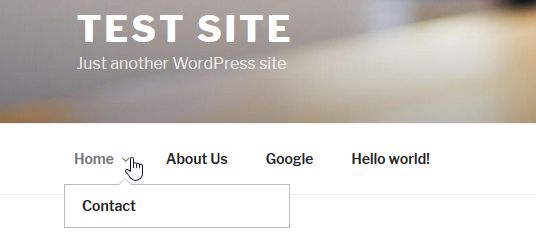
Similarly, if you want to reorder the menu items so that ‘About Us’ appears first in the menu list, you would click and drag that menu item to the top. Try that now, then click ‘Save’, and refresh your web page to see the result (shown below). Note that ‘contact’ is a drop-down menu item under ‘Home’ and that ‘About Us’ is the first menu item on the list.
Step 10: Editing Menu Items
Let’s suppose you want to change the name of the ‘About Us’ menu item to say only ‘About’.
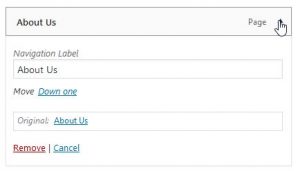 Go back to the section in WordPress where you control the menus. (See Step 4 above). As shown at the left, click on the little down arrow on the far right side of the ‘About Us’ menu item. This reveals all of the details about this menu item. Now in the Navigation Label area, change About Us to About. (Don’t actually do this.)
NOTE: This window is also handy if you want to remove a menu item. All you do is click on ‘Remove’ at the bottom left.
Step 11 Adding Posts and Links
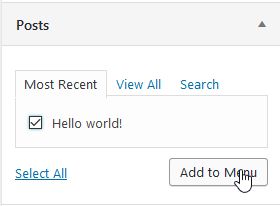
If you have posts on your website, you can go to the page from which the menus are controlled, click on the little down arrow on the far right of the ‘Posts’ and it will display the most recent posts you have. You can add them to your menu in the same way as you added pages.
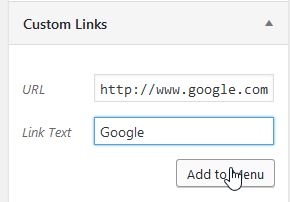
In addition, you can add links to pages on other websites. You can do that by clicking on the little down arrow at the end of ‘Custom Links’. This allows you to add links to whatever website you like by typing in the URL. At the left, I’m adding the URL for Google and clicking ‘Add to Menu’.
If you did all of this and changed the ‘Home’ menu item back to the top of the list, your final menu should look like what is shown below:
Enjoy working with WordPress menus and if you have any questions please feel free to reach out to me!
For all you bloggers out there, this is a pretty cool shirt.


